Wednesday, April 20, 2011

shower bases


just before the holidays i was able to install the shower base in the bathroom all that needs to be done in preperation is to cut out the waste hole this is done with the circular saw to make a square as showen below next is that the glue is applyed to the bace of the shower bace at 50mm spacings then pushed into corner then silicon is applyed at the joint to the base and wall to set in a seal then weights r placed on top to make sure the glue is at full strength.
waste hole cut with circular saw
glue on base of shower base
silicon on shower base
weights

Monday, April 18, 2011

gib, plasterboard, drywall, elephant board = stuff that the walls are made of part 2

when gib is placed on walls they can be ither placed verticaly or horizontaly both have pros and cons
vertically = requires more joints and bore boards but on some walls they so save on waste
horizontaly = requires less joints and less boards but depending on the wall can leave with alot of waste

for my room (the bathroom) i am using the horizontal method as it uses less boards and off cuts can be used for other parts
when doors are being cut out the easyst thing to do is place a full board over and fix then cut out the door afterwards as showen below as for penitrations they are better left measured and then cut out before fixing this also goes for windows
when cuting gib board what you need is a craft knife and a blunt saw (because plasterboards bulnt blades easly) for window and door openings and for penitrations a gib saw the craft knife cuts on the face side and fermly as well next you snap the gib and cut paper on the other side and your done

temp blocks placed to allow glue to fix better
hole cut for light switch
hole cut for shower penitration
how door opening is cut open
door opening finished

gib, plasterboard, drywall, elephant board = stuff that the walls are made of

for the next few days after insulation we install the plasterboard its is very important to be carefull because if you place fixings in too deep there will be no hold and you will damage the plasterboards.
there are many types we used 3 on out houses standard, aqualine and braceline each have theyer own speical uses
standard = is the normal plasterboard and can go in most places
aqualine = goes in wet areas bathroom etc
braceline = are extra strong for load bearing areas of house such as corners

fixings are also diffrent depending on the type and where the board is going
standard = fixings at every 300mm along the edges and in line with ceiling batterns when applying to ceilings it is also important not to place glue where the screws will be placed

aqualine = this is for tiles like in the bathroom where i am working they are at every 100mm and no glue is required also it is important to screw along nogs that go along the whole length and to mark out where pipes are and avoid screwing there

braceline = on walls nailing pattern is 50mm from edge after a few it is 150mm then at other end 50mm again this alows for the extra weight of the gib

when fixing to ceiling if the room requires more than 3 boards back blockers must be used they allow for extra grip also gib can come with difrent edges T/E(tapered edge) and S/E (straight edge) what is important to remember is that to the wall is S/E and at joints are T/E this allows the plasterer for easy work and the builder pays less pictures showen below
back blocker screwed in

gib aqualine

glueing pattern for plasterboard

gib braceline

gib standard on ceiling

nailing pattern for braceline
screwing pattern for tiles

Friday, April 15, 2011

apple candy floss insulation


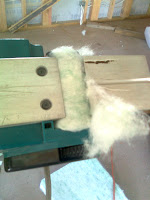
one of the 1st steps in interior is insulation and for our house we used greenstuff that does not irritate the skin but is harder to cut than pink batts. insulation is simple to install all you need to do is cut and fit into the outer walls and above the ceiling batterns it is important to also make room for pipes, wires and other pertrudions through the walls also its important no to pack it in too much or the insulation will not be as affective and have less air which is important for insulation. other steps involve straightening studs and planing down lintels for the insulation of plasterboard when doin this remember to remove near by insulation other wise it can jamb the planer. pictures are showen below.
planer jambed with insulation
ceiling insulation cut out for pertrudion
wall insulation
ceiling insulation

Friday, April 1, 2011

we are finaly indoors just in time for winter 2

once the weatherboards are up we put in the finishing touches to them such as the corner soukers and sofit liners showen below 


sofit liner marked out for weatherboard with use of scriber


how apex should look with sofit liner


sofit liner marked out for sofit jointer

corner soaker being applyed

corner soaker cut to allow for the top

the first thing to do is to cut the sofit liners to fit in the corner between the top of the weatherboards and the sofit to stop air flowing through we do this my simply marking out and cuting the wood to fit for jointing we use bevel cuts just like the weatherboards and apply by drilling then using rosehead nails. but for the gable ends they are marked using a scriber to fit with the weatherboards shape also with all liners they need to be cut out (with craft knife or chizel) to fit the sofit conectors.
the next part is to nail in the corner soakers it is best to start from the top down an they fit uner eachother it is also important to press the soaker down before nailing and to make sure not to damage the soaker with your hammer

we are finaly indoors just in time for winter

we finished the weatherboards about 2 weeks ago and this week have done insulation and are geting into the gib work

but first the weatherboards. we start to create a datum point for the story rod which helps mark the places where the weatherboards will be placed first we get any small piece of weather board that can reach the length of the flashing and place it on top and measure 5mm above this is done by placing an engendering rule under the weatherboard at each end of flashing we then mark on the top of the weatherboard on each cavity battern we then run a string line across the marks and this becomes the datum point
Next we mark out a story rod which will show every point where the top of the weatherboards will go once the rod is marked we line it up with the datum point we mark down the cavity batterns and square the mark off. This is continued around the house
We now begin on placing the weatherboards on the house starting from the bottom we cut a bevel cut (open cut 1st) on one end (if starting from a corner the other side is cut) an then line the top up to the line on the cavity batterns and mark off other end to be cut accordingly once cut we line it up to line again, (if corner is cut a mock weatherboard is placed so that corner is cut correctly and square) paint the cut ends and tack it on the top we use a level or string line to check the straightness of the board and to let it be adjusted accordingly once this is done a hole is drilled within 10mm of the weatherboards 23mm lap this is easily done with the use of the protector (showed below) that is lined up with the cavity battern and the bottom of the weatherboard then a rose head nail is nailed into the hole and tacks are removed this step is repeated up the house.
some weatherboards have to be cut to fit around a window opening this is done with the jigsaw we measure the weatherboard starting from the joint to both ends of the opening adding and minus 10mm on each end of opening once cut with jigsaw it is fitted like the other weatherboards except no nails are to be under the opening.
Other weatherboards are cut for flashing all that is done is the weatherboard is marked to fit around flashing and then cut with jigsaw.
all photos of this are showen in the previous post